Tags help you group items in Insightly. You can add tags to opportunities, projects, contacts, organizations, and emails. The best way to describe how to use tags is with an example. If you are categorizing all your projects into Big, Small, and Tiny, you would first tag three projects with those names. You can then go through each project and add a tag to each one. To then see all the small projects, you can either click on that tag in one of the projects to display the list containing all projects with that tag, or click on the small tag in the tags index to see the same list. Tagging is a very simple concept that’s easy to understand and use, and great for categorizing your items.
Adding or removing tags
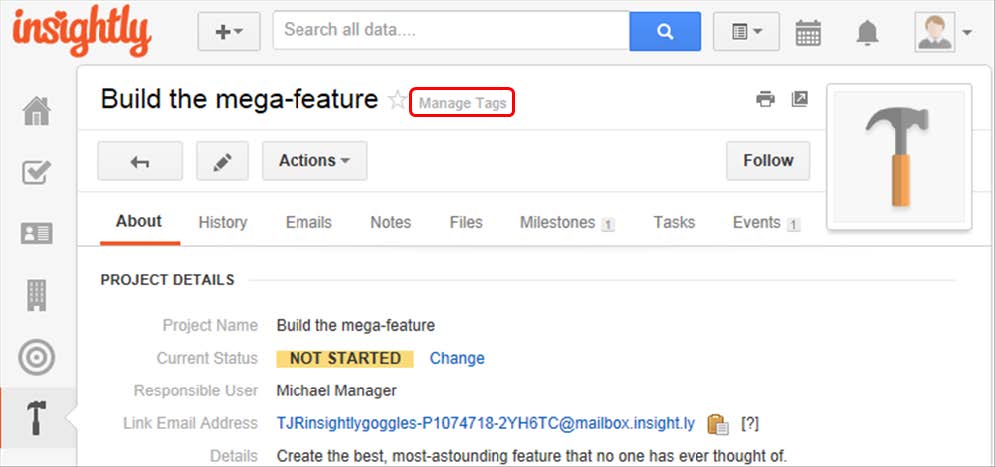
1. Click the Manage Tags link at the top of the record.
2. Type the tag name and click the name from the list or press the spacebar. You can remove a tag by clicking the X to the left of the text.
3. Note: If you have multiple words in a tag, you can use the underscore or some other character to separate them; for example: one_word_two_words or red.words.blue.words.
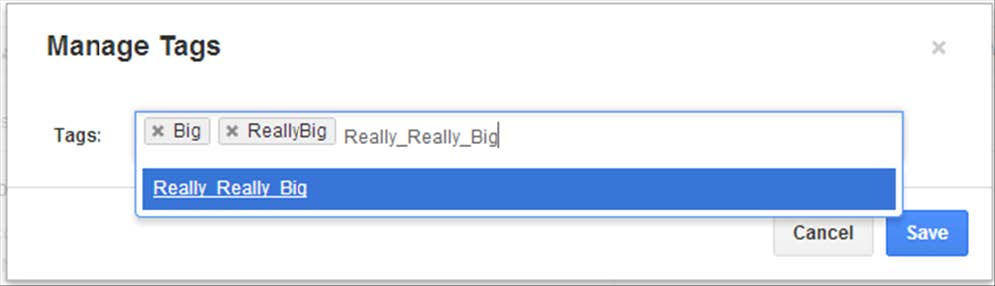
4. Click the Save button.
Finding tagged records
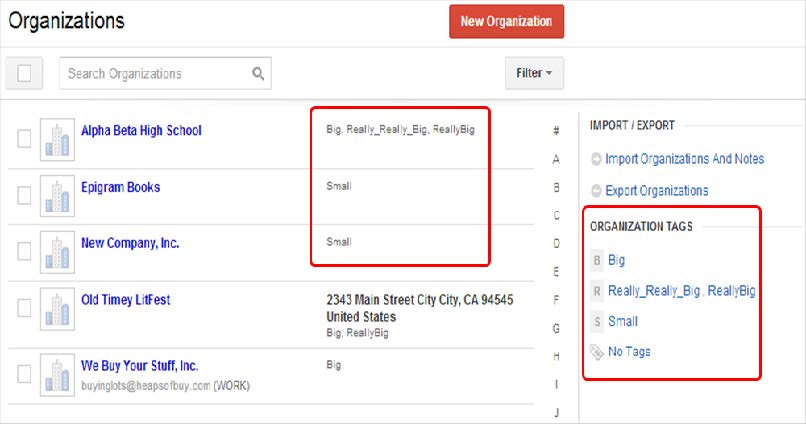
Tags will appear next to each tagged record in the list views, and a list of tags that are used for each record type will appear on the right sidebar. Contact tags appear on the Contacts tab, organization tags appear on the Organization tab. You can click on any tag to view all the corresponding records. Once you’ve selected a tag, you can click Select Multiple to make another selection or None to clear your selection.