- Go into Production Studio C and close all applications, INCLUDING Wide Orbit.
- Right click on Wide Orbit and select “Open.”
- BEFORE launching the program, please use these print screens to configure the launch settings.
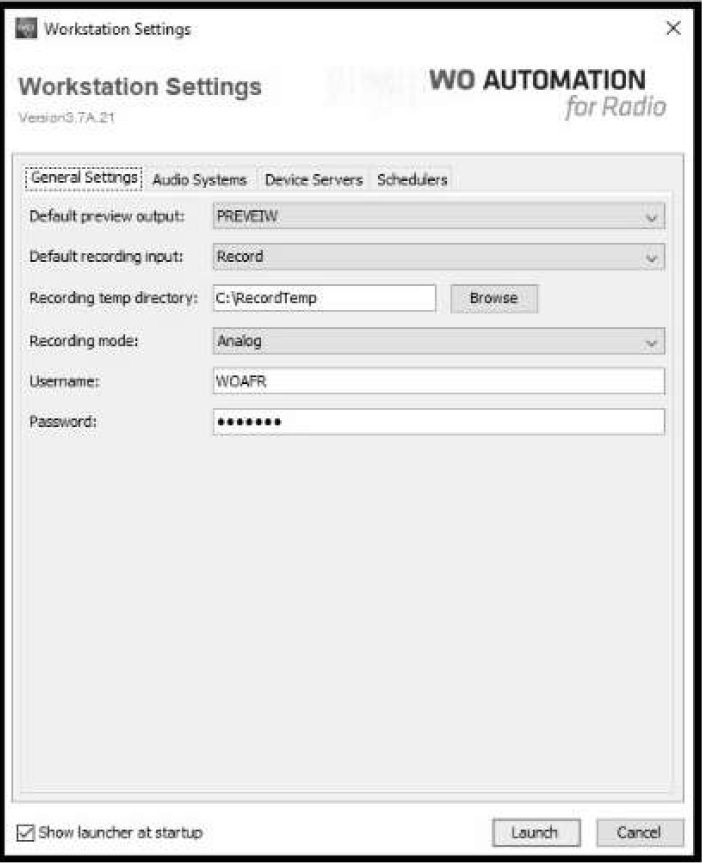
- This is the correct setting for the General Settings tab:
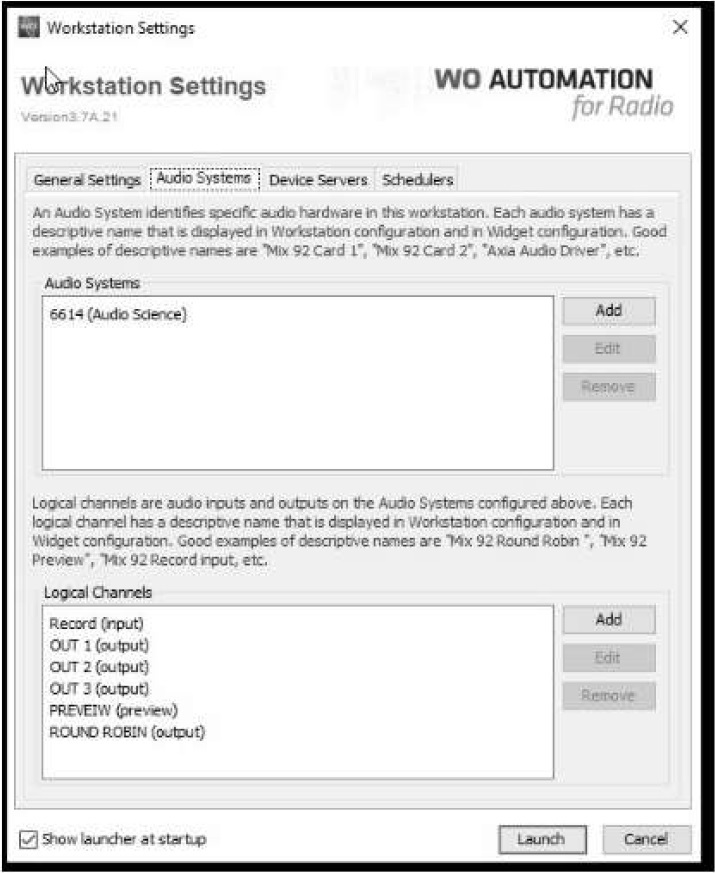
5. This is the correct setting for the Audio Systems Settings tab:
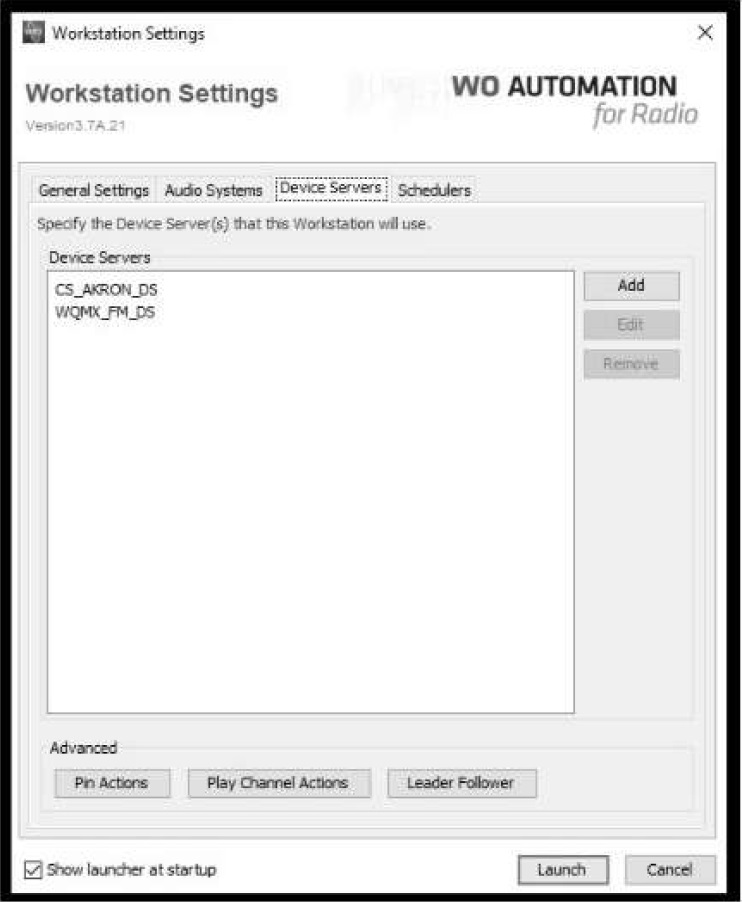
- Open the Device Server tab and click the “Add” button.
- When you add the device server (as the only one that should always be there is CS_AKRON_DS), your screen will look like this:

- Make sure it says the station call letters you want, FM (or AM for WAKR) and DS in the format listed above.
- This is the correct setting for the Device Servers Settings tab:
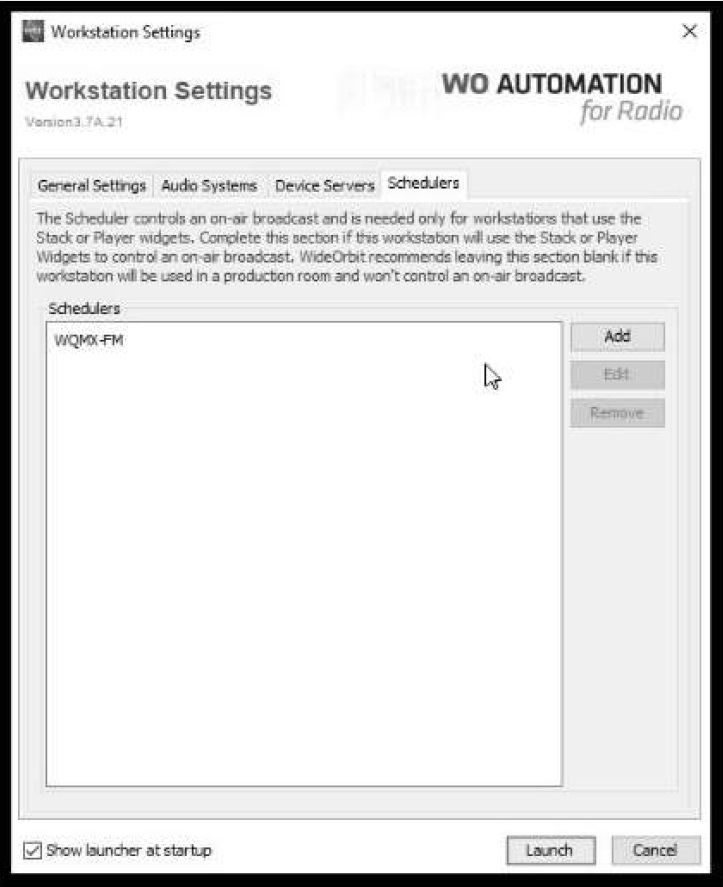
- Open the Schedulers tab and click the “Add” button.
- When adding a scheduler, you’ll need to make sure the following settings are entered:
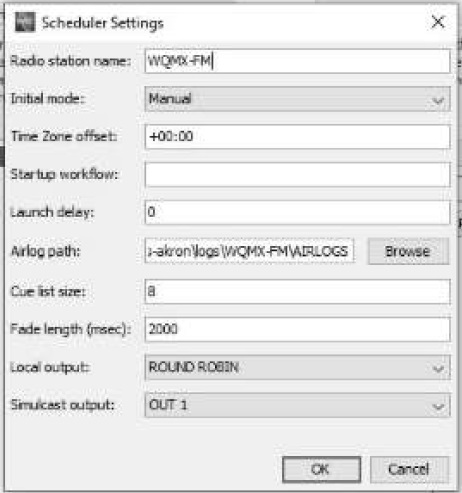
- You’ll need to make sure the correct Airlog Path is selected. Path should look similar to Ilcs-akron\logs\STATIONCALLLETTERSWIRLOGS
- Click OK.
- This is the correct setting for the Schedulers Settings tab:
- Click Launch.
- Open the Menu option at the bottom left of the Wide Orbit Screen and select Configure Widgets.

- On the left side of the Widget screen, select “Add Widget”.
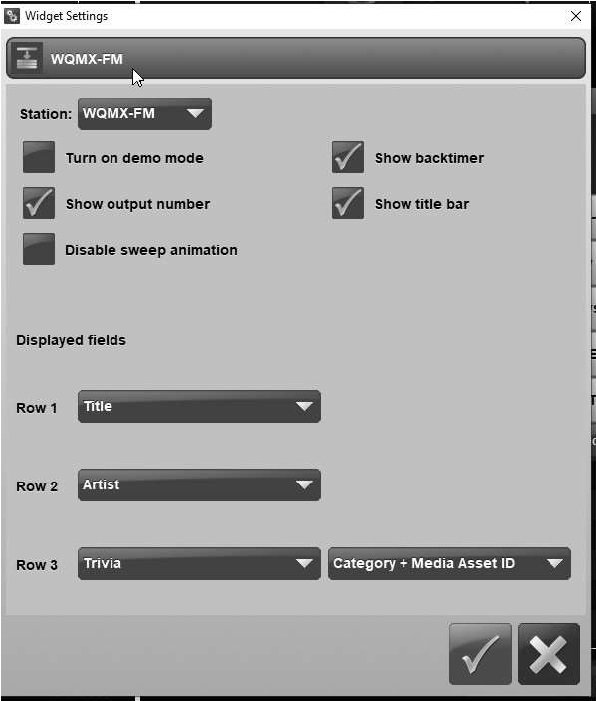
- Select “Stack” and click “Accept”.
- Make sure the Stack Widget settings look similar to the picture below:
- Hit the green check mark button to exit the settings of this widget.
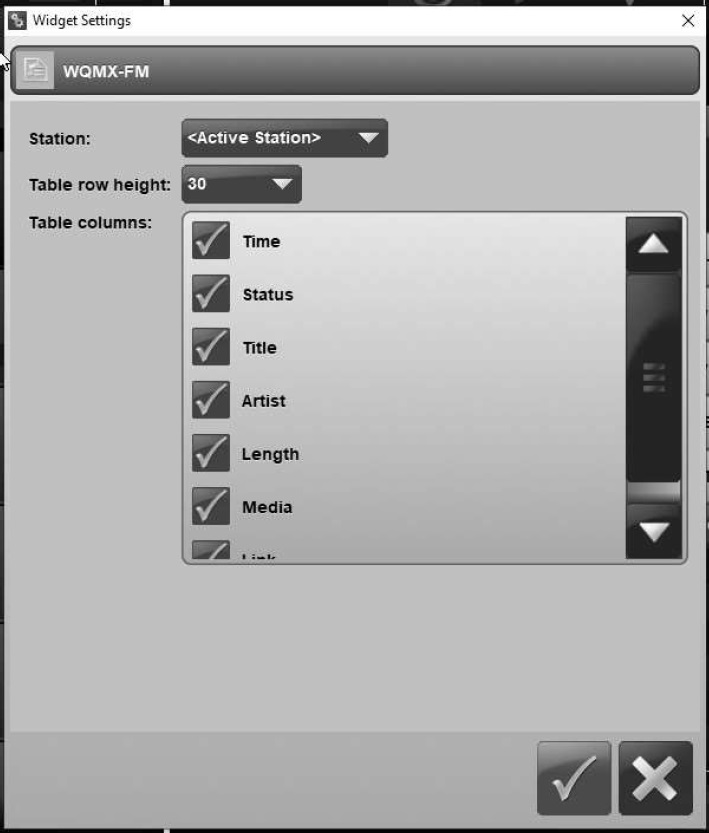
- Make sure the right hand side widgets include the Playlist widget. You’ll have to tell it what station on this screen as well. Make them look like this:
- Hit the green check mark button to exit the settings of this widget.
- Hit “Apply” at the bottom left corner of the Wide Orbit screen.
- Make sure you see the correct date listed, which it should grab due to configuring the stack widget just before this.
- Try to time it up as close as you can with what’s playing live on the air, and put it in “Automatic” mode.
- Make sure the board is correct and you can hear the music. You may need to pot up the Wide Orbit outputs.
- Go into the Engineering office and at the bottom of the second rack, you should see a switcher that has each station on one side and Prod C on the other. Push the Prod C button for the station in question when you’re ready to switch over. As Seen Below:
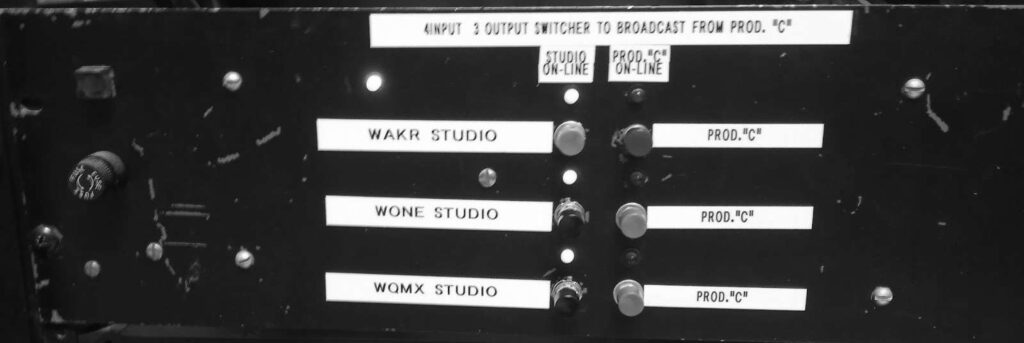
- As long as you’re hearing audio on the air, you have been switched. (This is the point where
IT/Engineering or the user can reboot or do whatever needs done in order to fix the Studio PC)
**Note: The affected station can run from Prod C’s setup for as long as it needs to (days, weeks, months) and has all the regular stuff that the on-air studios have in place to run properly, including mics.
How to Move an On Air Station from Prod C to the Home Studio
- When the work on the main studio PC is completed, make sure Wide Orbit is up and running in “Automatic” mode on the Studio Wide Orbit PC.
- Double-check the board is still correct and you can hear the music again.
- Go into the Engineering office and at the bottom of the second rack, you should see a switcher that has each station on one side and Prod C on the other. Push the button for the station in question when you’re ready to switch over.
- As long as you’re hearing audio on the air, you have been switched.
- Go into Production Studio C and put it on manual and then the hotkey can be removed the same way it was added (steps above – remove widgets and things on the launch screen).
- Now the Prod C studio is back to a Production studio and all is well.